
After changing the firmware, you will have to perform a PID Autotune to calculate the Kp, Ki and Kd values. These values will vary from printer to printer due to the different behaviour of the heating cartridge and the thermistor as well as slightly different heat capcity and conductivity of the hotend assembly.
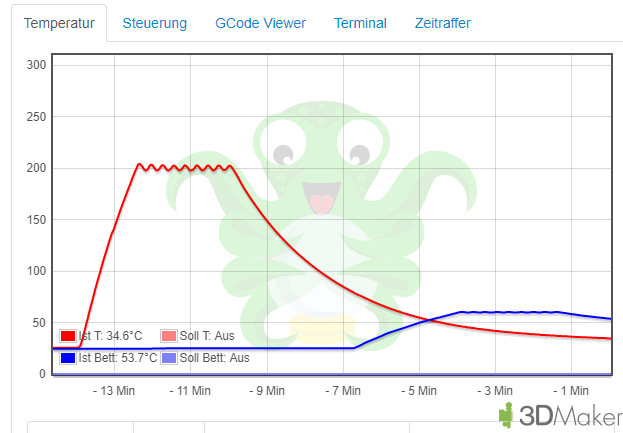
One sign of bad PID values are very long heating times, overshots of the temperature and thermal runaways.
Contents
Activate PID control for the heatbed
To activate the PID control for your heatbed you will have to open your firmware in the Arduino IDE and navigate to the configuration.h. Go to “PID > Bed Temperature Control” and remove the two // in front of the following line:
//#define PIDTEMPBED |
PID Autotuning
For this we will need a way to send gcode to our 3d printer for example pronterface, octoprint, Simplify3D or any other. First of all we are going to set up the gcode.
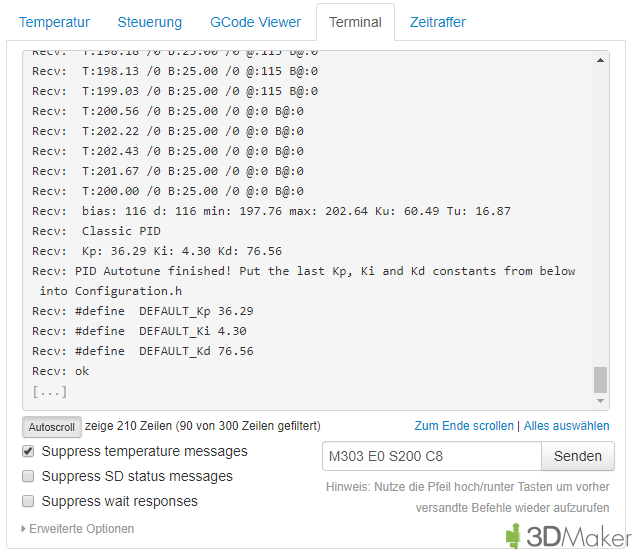
The gcode for the PID autotuning is the M303 command. After that you will have to define the heating element you want to do the tuning for. The S behind that stands for the temperature you want to do the PID tuning.
The c stands for the cycles you want to do. The more cycles, the better the PID values. I usualy take 8 cycles.
You will get new Kp, Ki and Kd values after each cycle as well as an averaged after the end of the PID-tuning. Remember the last value you get and save it either to the eeprom or change the firmware of your 3D printer.
Tuning the hotend

If you are mainly printing PLA you probably want to turn on the parts cooling fan. Use the command:
M106 S255 |
S is not in % but goes from 0…255. Just multiply the percentage you usually use for the parts cooling fan to the 255 and you get the desired value.
If you are mainly printing one kind of filament, chose the temperature you are printing it at. If you are printing many different, chose an average or rather a weighted average towards the higher temperatures. If you tune it for too low temperatures, you won’t reach the higher temperatures. However if you tune it for too high temperatures overshoots can appear. For both cases there could also be a high fluctuation of temperature. So if you see any of these problems, perform a short PID tuning.
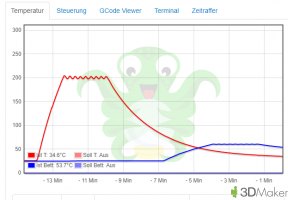
We are going to use the following command to do the PID tuning for 200°C and 8 cycles.
M303 E0 S200 C8 |
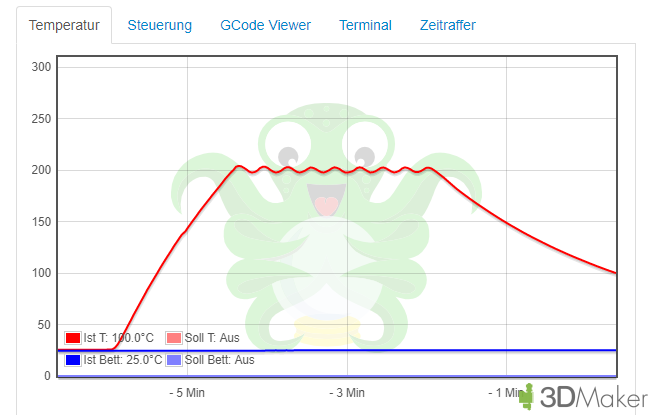
Wait till all the cycles have finished and remember the averaged Kp, Ki and Kd values.
To save these values you have two options:
1. EEPROM
To save these values to the EEPROM you will need to have it activated in the marlin firmware. If you own the standard A8 board it is already activated, if you are using a RAMPS with a custom marlin setup remove the two // in front of the following line:
M301 P1 I2 D3 |
And to save the EEPROM use the following command:
M500 |
2. Firmware
To save these values to the firmware, open the marlin.ino in Arduino IDE and go to the configuration.h. Navigate to PID Settings and edit the following lines:
#define DEFAULT_Kp #define DEFAULT_Ki #define DEFAULT_Kd |
Tuning the heatbed
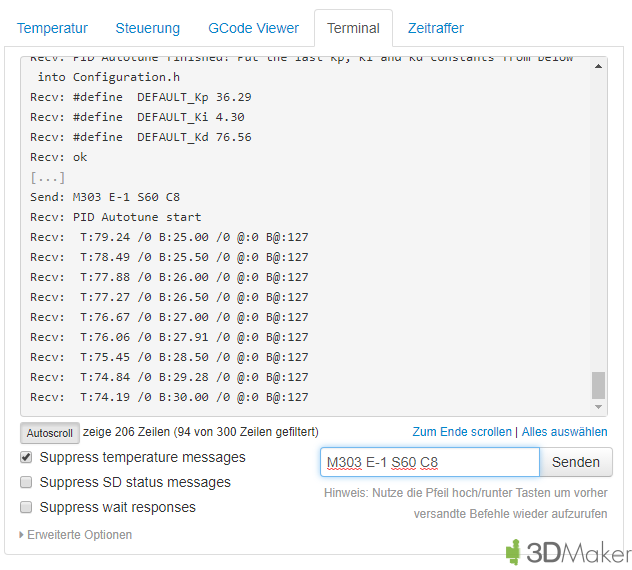
Because I am mainly printing PLA, I will set up the PID tuning for 60°C and again using 8 cycles.
M303 E-1 S60 C8 |
Again wait till all cycles have finished and save the averaged values.
1. EEPROM
For the heatbed use the following command
M304 P1 I2 D3 |
and again save the EEPROM:
M500 |
2. Firmware
For the heatbed you will have to edit the following lines below PID > Bed Temperature Control:
#define DEFAULT_bedKp 1 #define DEFAULT_bedKi 2 #define DEFAULT_bedKd 3 |
Your Bangood links in the Spare Parts section of your website are Access Denied links.
Thank you. Changed it